Pages

Thursday, November 10, 2011

Pinecone Turkey Centerpiece

This is one of my favorite projects from last fall so I had to bring it back for my classes this year.  The supplies needed for the Pine Cone turkeys include So far they have been a big hit with everyone who makes them or sees them!

  • Medium to large size Pine cone
  • Pair of Google Eyes
  • Red Felt for Gobbler
  • Yellow Felt for Beak
  • Orange Pipe Cleaners
  • Styrofoam Disk
  • Brown Paint
  • Foam Paint Brushes
  • Moss
  • Silk Flowers
  • Hot Glue/ Tacky Glue
Pinecone Turkey Closeup
 Here are my ladies from Atria in Carrollton, TX.  They really had fun making their turkeys!


We've also been making some great hand warmers made from denim.  Will try to put a tutorial together for that project soon.  Since most of my students have a touch of arthritis, they are looking forward to using them this winter.

Till next time-  Have Fun and Stay Creative!

Stephane


Tuesday, November 8, 2011

Fall Wreaths at Franklin Park

In October we made some great Fall Wreaths at Franklin Park in North Richland Hills using pine cones, acorns, a variety of silk flowers, silk leaves, gourds and other natural materials.  Everyone's wreath is unique and reflects each ladies' unique personality:

Proud of her Fall creation!

What a pretty wreath

Teamwork really makes a difference.


A pretty wreath for a pretty lady!

Ready to hang on her door for Fall

A wreath full of flowers
Everyone is ready to decorate their doors for Fall.  Won't be long till we change to holly, green and sparkly gold since Christmas is right around the corner.  Will share another fun fall project in my next post.

Till Then  Have Fun and Stay Creative!

Stephane

It's Fall Ya'll! Let's Make Door Decorations!

I can't believe October flew by so fast and we are already into the 2nd week of November!

I haven't had much time to post about our projects recently but would like to share some of the fun crafts we have been making the past month.  The ladies love to decorate their doors so we put together some fun door hangers for fall including a great Pieced Paper Owl project, a Stuffed Brown Paper Pumpkin door hanger and a Cork and Scrapbook paper Turkey door hanger.  Both the Owl and Pumpkin projects start with  brown kraft paper as their base.  Both are stuffed to add dimensions.  Both are embellished with silk flowers, raffia and scrapbook paper.


Owl Pieced Paper Project


Bonnie and Ora Mae were really happy with their owls!

Mary and Evelyn's owl projects turned out great!

Showing off her Pumpkin with pride!

Happy with her Door Hanger.

My students at Christian Care Center really like their pumpkin door hangers!

Cork and Scrapbook Paper Turkey Door Hanger

The Turkey Door Hanger  base is made from a circle of thick cork, embellished with Fall scrapbook papers, felt gobbler, foam legs and google eyes.

I still haven't got my head wrapped around Christmas yet- but will be starting to make Christmas ornies and decorations this month.  Seems like we just had Halloween!

Till Later-  Have Fun and Be Creative!

Stephane


Wednesday, September 7, 2011

Patchwork Quilt Bird Collages and Rolled Paper Frame Tutorial

Boy- the month of August flew by in a blaze of glory!  I am so grateful to have a break from the terrible Texas heat.  September is finally here and the holidays are not far behind.

This past month my classes have been hard at work on several fun projects.  We have finished up most of our "Patchwork Bird" collages.  Sometimes my students really hated painting over their collages so I think we will revisit this project and make a collage "painting" next time.   Here are a few of our finished masterpieces:

Unique works of art


Lea's finished collage
Happy with her final result!


One of my favorite projects we tackled recently was our Rolled Paper Bead  Frame.  This project is a little labor intensive and takes several classes to complete, but the finished project is really fun and unique. Everyone was very excited about how the frames turned out.  Here is a quick tutorial for the rolled paper frames:

Supplies you will need:

Magazines
Scissors or Paper Cutter
Wood Dowels/ Skewers
Glue Sticks
Tacky Glue
Acrylic Paint
Foam Brushes
Varnish
Lots of Patience


1.  Rip out colorful pages of your old magazines- old calendars are great for this project as well.

2.  Cut lots and lots of strips- about 1 1/4 inch wide (or the width of the frame you will use).  Focus on the design at either end of your strip because that is what really shows up after you roll the paper.

3.  Get to rolling.  I used wood dowels, but you can use straws or wood skewers to roll the paper on.  Important note:  only glue the last 2 inches of the paper- do not glue anything in the beginning, just tuck the ends under and start rolling.

4.  Paint your frame- let it dry.

5.  Glue your paper beads onto your frame- Tacky glue is great for this purpose.
 

Final step is varnishing your frame
6. Once your frame is completely covered, then apply a light coat of varnish or Mod Podge to the finished piece to protect it and add a nice gloss coat over the painted frame.

7.  Then add a photo and give to someone you love!

Finished Frame ready to be given as a cherished gift

We've also been very busy playing with our Polymer Clay and are learning a lot about Poly Clay techniques and Jewelry making.  I usually am so busy during class that I forget to take pictures of our work, but will try to take some photos of our next projects to share.

So till next time-  Have Fun and Stay Creative!

Stephane


Thursday, August 18, 2011

"Patchwork Quilt" Bird Collages

We have been hard at work this month on our "Patchwork Quilt" Bird Collages.  Several of my students took a look at my sample piece and noted that it looks like an old timey patchwork quilt- so the name stuck.

Originally I had used magazine pages cut in small pieces for the "quilt pieces"  but one day, could not find my bag of cuttings so resorted to using scrapbook papers instead- and I must say the results are actually much more colorful and pretty.  So we have continued to use random scrapbook papers as our base collage- sometimes they are so pretty, my students don't want to paint over them- and I agree that the paper collages could stand on their own as a work of art.  Here are some of my students in action:

My ladies at Atria in Richardson- hard at work!
A collage in process

My group at Chambrel at Club Hill hard at work!


Close up view of a finished collage
We will be finishing our mixed media collages tomorrow at Chambrel- so I will post photos of our finished masterpieces.  I am very excited to see how everyone's artwork turns out!

Till then-  Have fun and Stay Creative!

Stephane

Wednesday, August 3, 2011

Having Fun with Fresh Flowers

I love flowers!  I love growing them ( when it isn't a scorching 110 degrees), I love making them out of clay, paper and  paint, I love working with silk and dried flowers.  But I have to say- one of my absolute favorite past times is working with fresh flowers.

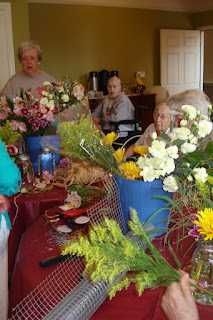
Recently we started a fresh flower arranging class at Horizon Bay in Plano.  I teach everything from Wine Appreciation classes to Arts and Crafts there- and this is our newest endeavor.  Yesterday we made homespun table centerpieces using quart size Mason jars.  They really worked out great!  We finished up just before dinner time- and they were a big hit with all the other residents.

I took the  circular lid out of the mason jar and cut a piece of chicken wire to fit just inside the top to create a floral frog.  It really helps to hold the flowers in place well.  Before we started working with the flowers we talked about some basic ideas of floral design, learned how to properly clean and prepare the flowers and how to care for the arrangements so they will stay fresh looking for several weeks.

Everyone really had a great time putting their unique spin on our project-  We made 21 arrangements in only 1 1/2 hours.  Here are a few pictures of our class:

Beverly hard at work!

Miss Flo working away-  i think she put together 4 or 5 all by herself!

Our group in action

One of our finished centerpieces

A cart full of flowers ready to go to the upstairs Memory Care dining area

The flowers really brighten up the dinner tables!
From the reactions we received from the other residents- I expect to have a lot more help in class next time!  Well- gotta dash!  Today we are finishing up our "Milk Carton Bird Feeders" at The Courtyard in Mesquite- and I have about 12 bird feeders to prep before class.

Till next time-  Stay Cool ( and I mean that literally) and Be Creative!

Stephane

Monday, August 1, 2011

Patchwork Bird Collage- Quick Tutorial

One of my very favorite projects that we started in July is another mixed media project that includes collage, acrylic paint techniques, and stamping.  I actually saw this project on blog-you can check it out here:  "http://www.crapivemade.com/ and liked it so much that I immediately got all the supplies together and did a couple of versions of my own.

My first try!
I loved it so much that I took the project to Silverado in Plano where we have already started our collages.  Some of my students are really excited about this project and are looking forward to finishing up this week.

Here are some quick instructions on supplies you will need and how to create this artwork:
  • I bought 8 x 10 canvases at Michaels (10 for 19.99 regularly but with their 40% off coupon- its a deal at $11.99) 
  • To save time in class, I went ahead and chose colorful magazine pages that we could use, tore them out and cut them into random sized pieces.  (Sometimes we even cut those pieces down to make the  collages a little morevisually interesting). 
  • I downloaded a couple of different stock versions of bird artwork and created templates for my students to trace with a Sharpie (although I will probably do this step for my Memory Care students).
  • Then using Mod Podge or watered down glue, create a collage on the unpainted canvas- cover the whole thing.  Don't worry if all of the edges are perfectly glued down- it adds nice texture if there are little imperfections.
For my first class- this was as far as we went in the process.  I only teach for about an hour- and the canvases needed to dry before we went to the next step.  I am going to trace the bird template for them before I bring the canvases back to them this week.
  • The next step is to carefully trace the Bird Template onto your collage.
  • Then with acrylic paint- paint around your bird design in your background color onto.  You don't have to cover the collage background completely- letting a little of the color show through adds interesting texture to the artwork.
  • Then water down a little brown acrylic paint and lightly brush over the entire canvas- it is best to work is smaller areas and wipe off the excess as you go.
  • Once you have antiqued your canvas you can dry brush accent colors onto the canvas and rub off excess or work it into the canvas as you like.
  • As a finishing touch, I added some stamped images and words to my finished work
I have to say this is one of my favorite projects so far.  It is really a pretty simple project- but you get a lot of impact for your effort.

Will post photos of our finished work later on this week!

Till then- Have a great week and Stay Creative!


Stephane

Winding Down Summer Already

Wow!  Can't believe it is August 1st already!  This summer has just rushed by.  I am already planning Fall projects for my classes and thoughts of Christmas projects can't be far away.

This past month  I became obsessed with collage and multimedia projects.  We put together some fun collages working with watercolor, tissue paper and scrap booking paper with some great results.

This is my class at Silverado Senior Living in Plano:

Lorraine was very pleased with her watercolor collage!
Miss Helen is always a fast worker with fun ideas!
Miss Ruth always enjoys participating and had extra special help today!
Miss Ruth and her "art assistant"
 At Chambrel  at Club Hill we experimented with eggshell mosaics with some very interesting results.  We did some watercolor crosses then embellished with acrylic painted egg shell to create a "stained glass" looking mosaic.  I also started an eggshell mosaic butterfly and think this would be a really pretty project as well.

Our Eggshell Cross Mosaics:

Our new class member practicing meticulous brush strokes.

These eggshell mosaics take real concentration!
Who knew you could be so creative with eggshells?
Evelyn is a fast study with the eggshell mosaics!